
I had the idea a couple years ago to start making maple syrup. After watching the price go from $60 to $80 a gallon, I decided it was time to make some of my own. I knew I had to start at least 6 months in advance to identify the trees, but I also had to procure an evaporator and all the supplies necessary to make my own maple syrup. There were oft told stories of how difficult and laborious the process is, but I decided to try it. The key was to reduce the most difficult part, which was the evaporation. This article deals with the evaporator.
After taking a look around at different used evaporators, I decided to build my own. My key requirements were to have at least 6 gallons per hour boil and to be able to also use this as a brick oven. This meant that I was going to build a flat pan that had 6 sq ft of surface area and a refractory brick lined firebox. A couple other features were that the pan would have dividers for a continuous flow operation and a spot for a blower for increased airflow.
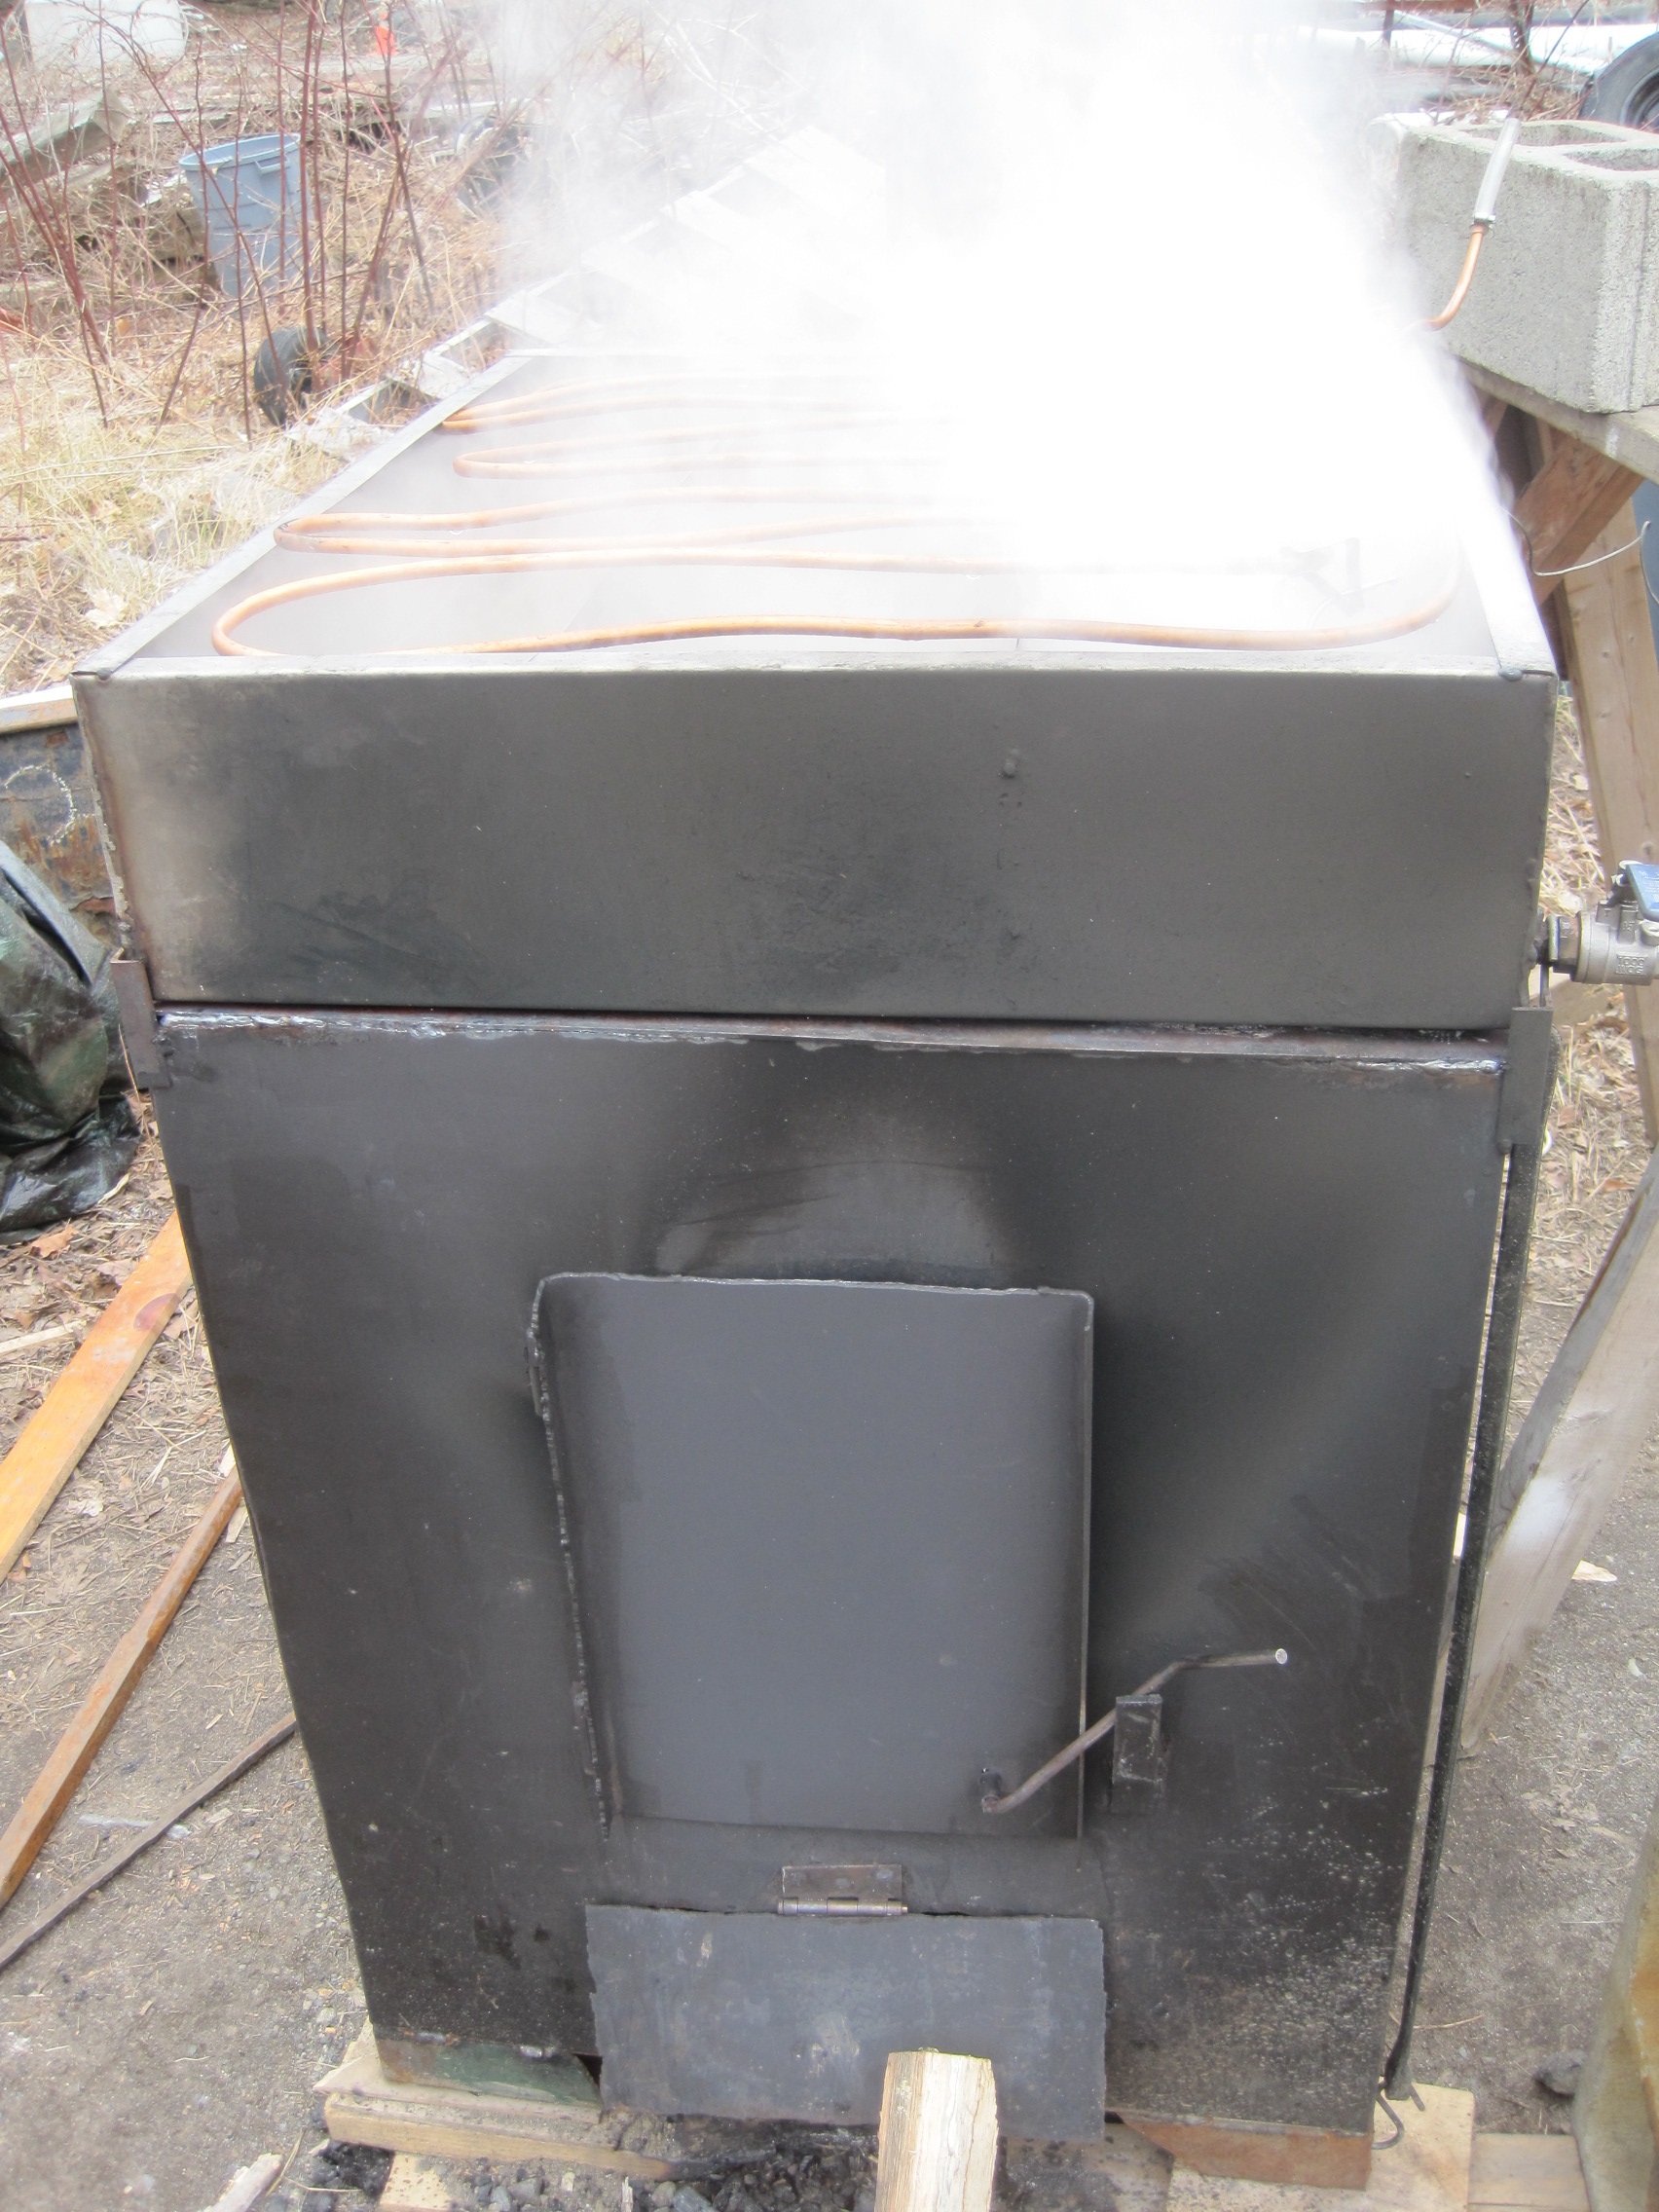
The final dimensions of the box were 36” deep, 30” wide, and 36” high witout the pan. This was designed so that there would be minimal cutting of the refractory brick. The box is made from 14 gauge steel, with 1” tubing legs, so it is only 1.5 inches off the ground. This was done mainly so I could get the forks underneath it and move it as needed. This will come in handy when needing to move it the other 11 months of the year when it is not in use as an evaporator. The box has 4 pieces of angle on the corner as pan guides and some gussets on each corner for resting the pan. Originally, there were no pieces of angle along the rest of the top of the box. It turned out, however, that this was required. The angle provided a place to put a rail gasket for the pan. This essentially is a piece of cermic fiber blanket that sits on the rail and keeps the heat in the box. Without it, there was some heat escaping and it would also soot up the sides of the pan, leaving some dirty hands and clothing. There is the front door, measuring 13.5” x 9”. The door has a latch to keep closed. In the end, I may end up putting a gasket on the door, but so far it has not proved necessary. Then, a draft door was placed below the main door. This measures 9 x 4.5” A 6” diameter hole was cut in the top back for a stovepipe and a smaller hole in the bottom back was placed for the blower. I welded some nuts in the corrects locations so I could bolt in the blower. The firebox was then painted with high heat paint (I used the quart size instead of the spray cans). After letting it dry, I placed all of the firebrick in the box. This is medium duty, high heat refractory brick rated at 3000 F. I placed the brick on the bottom first to create a good floor and then the front and back. The sides were completed last. I decided not to cement the brick in place in case I wanted to move it later on. The brick had no problem staying in place without mortar and allows me more flexibility. It took a total of 88 bricks. A couple will have to be cut to fit around the holes in the back, but other than that, no cutting was necessary. I will be putting some arch board behind the brick in order to cut down on the heat emanating from the sides. It’s not a lot, but I don’t want anyone to get burned touching it by mistake. This will go behind the brick to provide even more insulation.
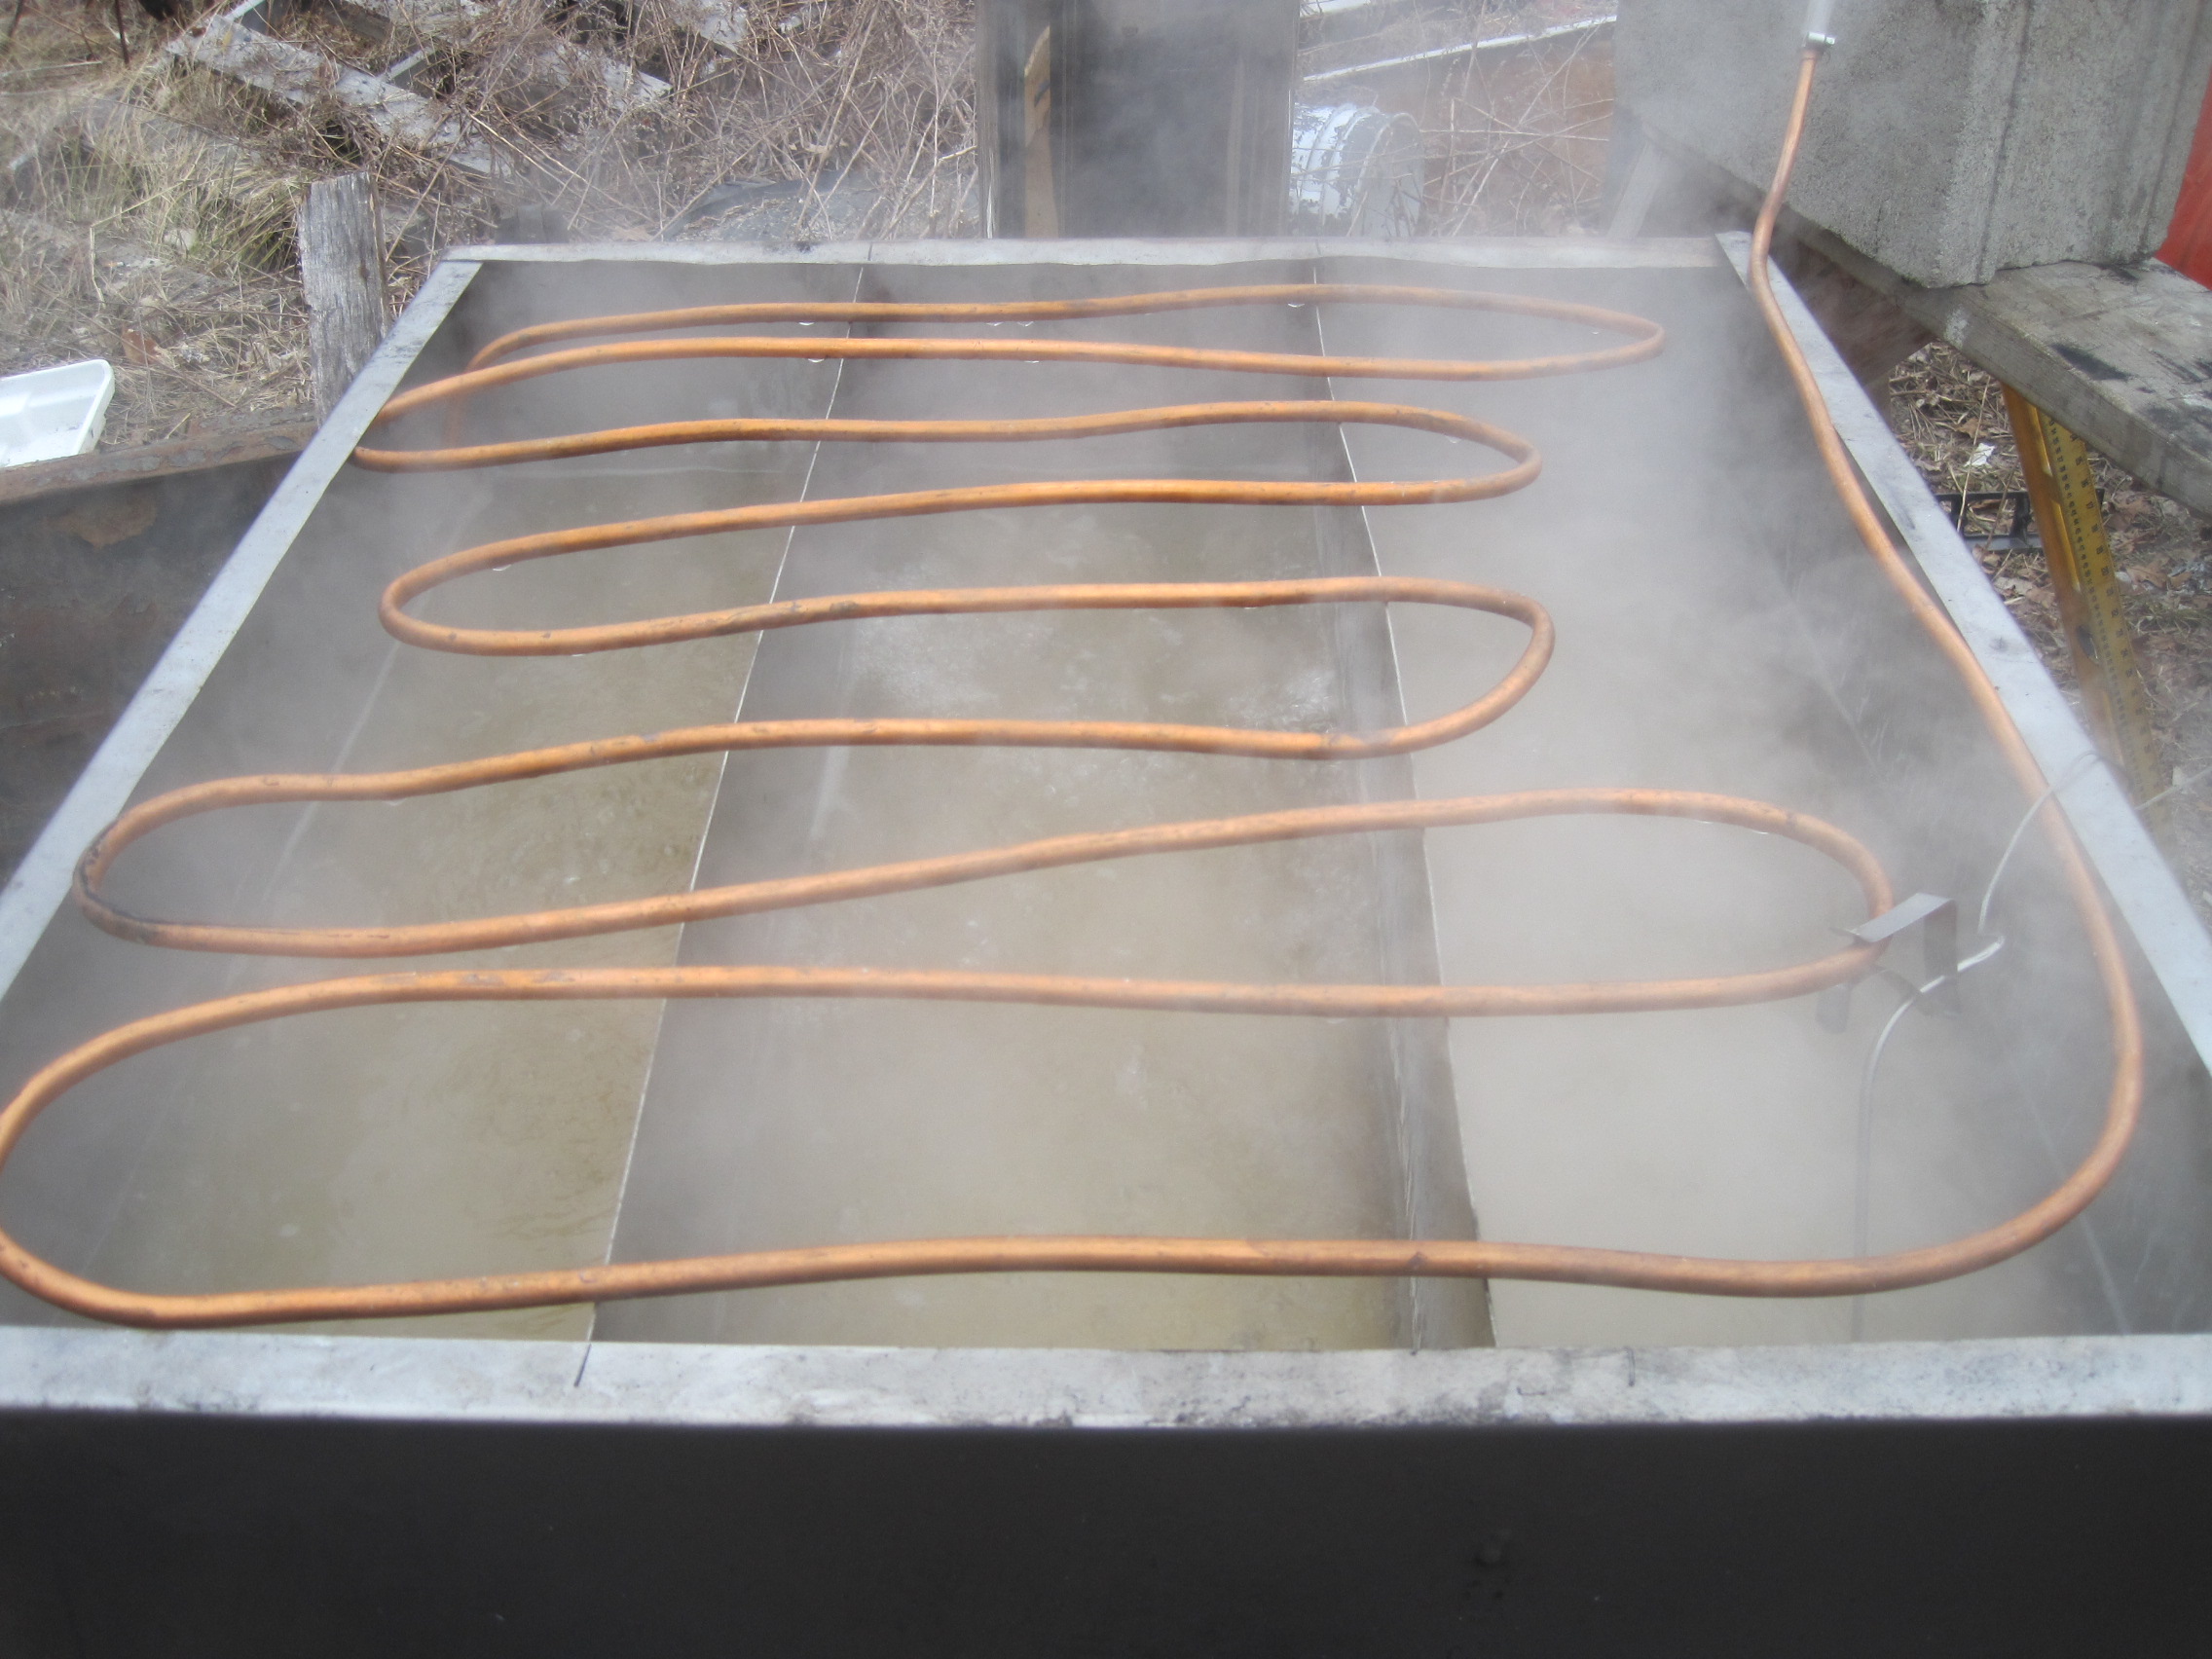
The pan is made from 18 gauge stainless steel and measures 30” x 36” x 7” tall. The height was abit too much as I don’t ever fill it with more than 3 inches of sap. The pan has 2 dividers to be able to create a continuous flow. The cutouts for these are 3” tall by 4” long. We’ll see in the long run if this was the right move. People indicate that you get a better gradient with a smaller hole. I then cut two holes in opposite corners for nipples to be placed so I could put two ½” stainless steel ball valves. These valves will be used to draw off the almost syrup. Welding small guage stainless is not easy, and it was difficult. The pan warped slightly, but it hasn’t really made a noticeable difference in the performance of the unit. The pan boils fairly evenly.
The chimney is made from 6” metalbestos stainless steel double wall pipe. I had received this from my father a few years ago. It had been used about 30 years ago and stored inside ever since. This included a tee for the exhaust and 3 sections to get to a height of 8 ft. I did have to weld on a piece of channel to hold the pipe. In the future, we will have to make something more secure, but it works for now.
That completed the evaporator build. We performed a leak test on the pan and found a couple, which we rewelded. We then ran the baking soda seasoning through it the first time before finally filling it with sap. We found that we were able to get 6 gallons per hour of evaporation without running it that hard. Peak times were more around 8 gallons per hour. This made for a fairly short day of evaporation, but with cool down, it was an 8 hour day to produce 1.5 gallons of syrup from 35 gallons of sap. All in all, the evaporator worked very well. The main modifications will be in the insulation area, mainly to make it more efficient. This will include putting arch board around each of the sides to cool the outside. Right now, it gets to 475, which is a bit too hot. I’d like to keep more of the heat inside.